Working with tonal underpaintings
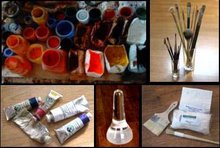
Starting Out...
When I first started out with oil paints, I was like a child in a sweet shop, keen to experiment with all manner of styles and genres. Having had no formal training in the craft of painting, I had a broad notion that oils would allow an artist to build up a painting in several layers and that there was a golden rule of 'fat over lean'. But for want of a teacher, or any particular method to follow, I would typically launch straight into a full colour 'underpainting', where at least 70% of the tone and colour work would be done in one sitting. After this I would work on some finer detail and refinements in maybe one or two 'fatter' sittings before considering the work finished.

Learning from the past...
Working like this was a lot of fun, but something was niggling at me. Having a deep admiration for the painters of the Flemish and Italian Renaissance, I was continuously wondering how they did it. What materials did they use? What techniques had they employed to produce work so different from mine? How come nobody was teaching this any more at art schools?

I could glean a certain amount online and from books, but it wasn't until I made contact with a teacher called David Cranswick that I was able to get some proper hands-on training in glazing and underpaintings. David had spent many years researching the practical techniques of the old masters and was now offering studio training to interested students. It was at this stage that I learned (among other things) how to start with a tonal monochrome underpainting, typically using burnt umber or other earth tones.
Below are a couple of old master studies completed as exercises during this time, both based on paintings at the National Gallery in London.
Study after Willem Kalf (oils)
Having been set this daunting exercise by David, the images below show a simplified version of how the painting was built up in stages, using a traditional gesso panel. (For more detailed step-by-step images with descriptions of what was happening at each stage, visit the master copies page).
Study after Verocchio (Egg Tempera)
This exercise was my first experiment with egg tempera, using pigments mixed to a yellowish 'verdacchio' for the underpainting. This taught me that the tonal underpainting method works as well for tempera as for oils. Below is a simplified version of the painting stages. (For more detailed step-by-step images with descriptions of what was happening at each stage, visit the master copies page).

Embracing the approach...
Having discovered the joy of tonal underpaintings, it is safe to say that this has become my staple approach. Unlike the master copies above, which start with a linear underdrawing, this method really comes into its own for me when working from life, where a loose 3-tone underpainting can be developed very quickly using a rub-back approach and then refined in the follow-on stages. In that respect, I feel that this method is very well suited to artists whose natural inclination is to work tonally, e.g. when drawing with charcoal, rather than those who favour a linear approach.
The examples below show a range of earth-based underpaintings in which I have used this method... some of which have been taken through to finished paintings. All of these use either burnt umber, burnt sienna or raw umber as the base tone. (visit my landscape and still life pages if you wish to see more detailed step-by-step images of any of these pieces)


Warm VS Cool...
A variation on earth-based underpaintings is the grisaille approach, which is Usually an opaque underpainting in a neutral grey, which can look like a black and white photograph if taken to a highly realist degree. An undisputed master of the grisaille underpainting was Ingres...

Something to aspire to indeed! I have not yet tried my hand at such a photographic grisaille, but below are a few experiments where I have adapted my slightly looser underpainting approach to use a cool, neutral grey, rather than a warm earth tone. So far I have to confess that I have not found any great benefit in replacing earth hues with a neutral grey. I think it essentially comes down to deciding whether each finished work is likely to benefit more from a warm or a cool underpainting.


Other underpainting approaches...
It is worth mentioning that in my experiments above, I have only skimmed the surface of the range of underpainting methods out there. Other key approaches to look into would include:
- the traditional 'verdacchio' (green) approach used for skin tones in early renaissance works
- the 19th century dead colour approach taught in many of today's 'atelier' schools
- the detailed underdrawings on panel, employed by early Flemish painters such as van Eyck
- the pros and cons of differing toned grounds
I am also continuously inspired by viewing the approaches of other living artists. Below is a link to a detailed grisaille technique that the portrait painter, Scott Bartner employs. I would like to try this technique for myself in time.
- http://www.bartner.nl/index2.html (click on 'demonstration')
Some Old Master Underpaintings (for inspiration)

Resources for learning more about underpaintings...
- Underdrawings in Renaissance Paintings
- Discussion with other artists
- Practical training in underpaintings and glazing
- Vermeer's techniques
- Leonardo's techniques
No comments:
Post a Comment